
How to Invest in Real Estate in India as an NRI: The Complete Step-by-Step Process

SUYUG Infra
Short briefing · 2,575 words · 12 min read · 6 questions answered
By Editorial team, SUYUG InfraReviewed by the SUYUG Infra legal & compliance desk
In this article · 9 sections
For NRIs based in the US or Canada, understanding how to invest in real estate in India from abroad can feel opaque. The process involves Indian banking regulations, FEMA compliance, legal representation, state-level registration, and cross-border tax reporting, none of which work quite the way property transactions do in North America.
The good news is that the framework is well-established and entirely executable remotely. What it requires is understanding each step in sequence, knowing which documents are needed at each stage, and not skipping the due diligence steps that protect you when you cannot physically be present. This guide walks how to buy property in India as an NRI, from eligibility confirmation to post-purchase rental setup, in a sequence that works whether you are in New York, Toronto, or anywhere else abroad.
TL;DR
- NRIs, OCIs, and PIOs are eligible to buy residential and commercial property in India; agricultural land, farmhouses, and plantations are prohibited under FEMA
- All funds must flow through NRE, NRO, or FCNR accounts; payments outside these channels create FEMA compliance gaps
- A transaction-specific POA, attested at an Indian consulate or high commission, allows complete remote execution without visiting India
- RERA verification, title search, and Encumbrance Certificate are the three non-negotiable due diligence steps
- Stamp duty and registration fee in Karnataka are payable at the Sub-Registrar’s office, at the rates the state has in force on the day
- Rental income is declarable on IRS Schedule E; taxes paid in India can be claimed as Foreign Tax Credits on Form 1116
Step 1: Confirm NRI/PIO/OCI Eligibility
Before anything else, confirm which category you fall under; each carries slightly different documentation requirements, though property purchase rights are broadly the same.
The three eligible categories under FEMA and RBI guidelines:
- NRI (Non-Resident Indian): An Indian citizen residing outside India for more than 182 days in a financial year for employment, business, or other purposes
- OCI (Overseas Citizen of India): A foreign national of Indian origin registered under the OCI scheme, and holds many rights of NRIs for property purchase purposes
- PIO (Person of Indian Origin): The deadline to convert legacy PIO cards to OCI-read cards was on December 31, 2025. Legacy PIO cardholders have to apply afresh to claim property rights.
What all three can buy: Residential apartments, villas, and plotted developments; commercial offices and retail spaces; no limit on the number of properties owned.
What all three cannot buy: Agricultural land, plantation property, or farmhouses. The prohibition is absolute under FEMA and cannot be circumvented through corporate structures.
Step 2: Open NRE/NRO Bank Account

All property-related payments must flow through India-based NRI banking accounts. Paying directly from an overseas account to a developer or seller creates a FEMA compliance gap that can complicate the repatriation of sale proceeds later.
The three account types and their best use:
| Account | Source of Funds | Repatriation | Best Used For |
|---|---|---|---|
| NRE (Non-Resident External) | Remitted from overseas | Fully repatriable | Property purchase payments; repatriating sale proceeds |
| NRO (Non-Resident Ordinary) | Indian income (rent, dividends) | Capped at USD 1M/year post-tax | Collecting rental income; paying local expenses |
| FCNR (Foreign Currency Non-Resident) | Foreign currency deposits | Fully repatriable | Staging capital during currency volatility |
For property purchases, the NRE account is the cleanest route, because payments from NRE funds are fully repatriable, protecting your exit flexibility when you eventually sell.
Step 3: Choose Property Type for NRI Buying Property in Bangalore or Any Indian City
Under FEMA, NRIs are restricted to residential and commercial property. A common purchase for NRIs buying property in Bangalore is a residential apartment in an established IT corridor, primarily because it combines rental yield, capital appreciation, and eventual personal use.
What to consider when choosing:
- Under-construction vs. ready-to-move: under-construction units are generally quoted below the ready-to-move equivalent in the same location, but the gap is set unit by unit and moves with construction stage, so price both from the quotes actually in front of you rather than from a band. What you are accepting in exchange is delivery risk; RERA reduces it materially but does not remove it
- Configuration: 3 BHK and 4 BHK apartments in IT corridors like Sarjapur Road are the stock senior IT professionals and their families actually rent, which is what makes the tenant pool for them deep. Check that against live listings for each configuration in the sub-zone — how many are advertised, and how long they have been advertised — rather than against anyone’s yield claim
- Location within corridor: sub-zone matters more than the corridor label. Carmelaram and Bellandur sit nearest the ORR employment belt and are more built out; Sompura Gate (Sarjapur Road) sits mid-corridor, where the announced infrastructure has furthest still to travel. That is a statement about what is delivered on the ground, not a forecast of what either will do next.
Step 4: Engage a Legal Representative / POA
Since many NRI buyers cannot be physically present in India for document signing and registration, a Power of Attorney (POA) is the mechanism that legally validates remote transactions.
How to set up a valid POA:
- Execute a transaction-specific POA, that is, a POA limited explicitly to the particular property and defined set of actions. A general POA carries significantly higher misuse risk
- Have the POA attested at your nearest Indian consulate or high commission in the US or Canada
- Have it adjudicated at the relevant Sub-Registrar’s office in India, and stamped within three months of its first receipt in Karnataka, before it is used — that period is set by section 18 of the Karnataka Stamp Act, 1957, and section 32 bars an endorsement once it has run. A notarised-only POA is not legally valid for property transactions in India
- The POA holder signs the sale agreement, attends registration, and handles possession paperwork on your behalf
Who to appoint: A trusted family member combined with an independent property lawyer (not the developer’s recommended legal team) provides the strongest protection. The lawyer conducts title searches and reviews the terms of the sale agreement before the POA holder signs anything.
Step 5: Due Diligence Checklist
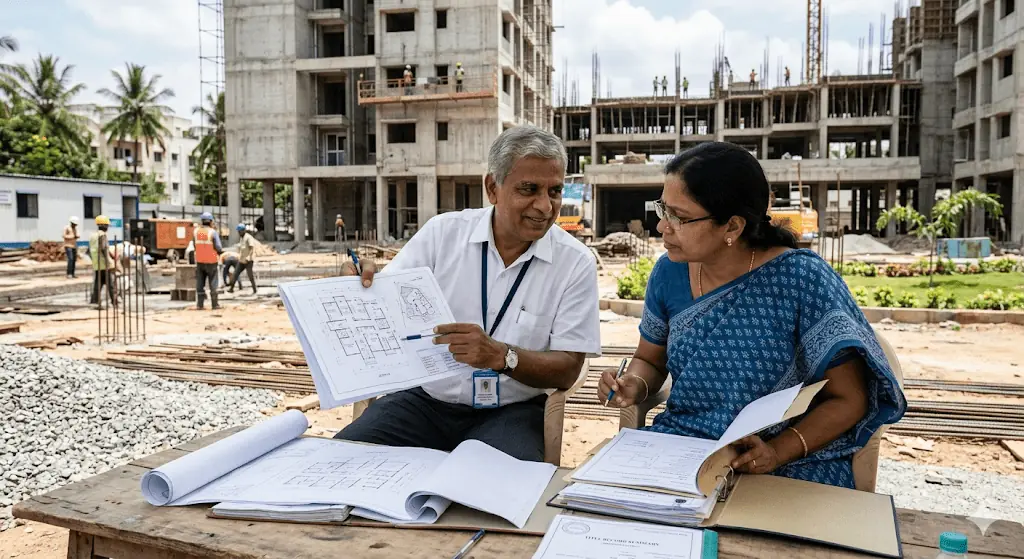
This is a key step when learning how to invest in real estate in India remotely. This is the step many NRI buyers under-invest in, and the one where many post-purchase complications originate. The distance from India creates a reliance on the developer’s assurances, which is exactly the wrong approach.
Non-negotiable checks before signing:
- RERA verification: Visit rera.karnataka.gov.in and verify the project tower-wise, in addition to the usual project-level verification. Check the registered completion date, confirm it has not lapsed, and review the buyer complaints section
- Title search and Mother Deed: Engage your lawyer to verify an unbroken ownership chain from original title to current developer; confirm the Conversion Certificate if the land was previously agricultural
- Encumbrance Certificate (EC): NRI buying property in Bangalore can obtain the EC independently via Kaveri Online Services (kaverionline.karnataka.gov.in); confirms no active mortgages or liens on the property
- A-Khata status: Confirms the property is within BBMP/GBA jurisdiction and fully regularised; essential for home loan eligibility and clean resale
- Sanctioned building plan: Confirm no deviations from the approved plan; buildings with significant deviations risk not receiving OC
- OC history: For ready-to-move units, confirm OC has been obtained; for under-construction, check the developer’s OC track record on completed projects
Step 6: Apply for an NRI Home Loan or Use Foreign Funds
There are two routes in financing when it comes to how to buy property in India as an NRI.
Route 1 — NRI Home Loan from an Indian lender:
- Available from many major Indian banks and NBFCs
- Loan-to-value is capped by the RBI in slabs and tightens as the loan gets larger; the lender applies the slab and may sanction below it
- Loan tenure up to 20 years; EMI payments must be made from NRE or NRO accounts
- Rates are repo-linked, so they move with the RBI policy rate plus each lender’s spread — get the current rate from the lender in writing
- Requires Indian PAN card, overseas address proof, employment/income documentation from your home country, and RERA-approved project sanction
Route 2 — Direct remittance from overseas:
- Wire transfer from your overseas account to your NRE account in India
- Payments from an NRE account to the developer via normal banking channels
- Fully repatriable at exit, which is the cleanest route for buyers who prefer to avoid Indian loan structures
For most US and Canada-based NRIs, direct remittance through NRE is simpler and avoids the complexity of Indian loan servicing. The home loan route makes sense if the buyer wants to preserve overseas liquidity or benefit from Indian interest rate cycles.
Step 7: Registration and Stamp Duty

Registration is the legal step that makes ownership official. In Karnataka, it happens at the Sub-Registrar’s office and is executed by your POA holder on your behalf.
Statutory costs in Karnataka:
- Stamp duty, charged as a percentage of property value
- Registration fee, charged as a percentage of property value
- Both rates are revised by notification and are published by the Karnataka Department of Stamps and Registration (kaverionline.karnataka.gov.in). Take the rate in force on your registration date from there and apply it to your own purchase value — on a crore-plus transaction this is lakhs, not a rounding error
Documents required at registration:
- Original sale deed drafted by your lawyer
- POA (adjudicated copy)
- PAN card of both buyer and seller
- Identity proof and address proof
- Encumbrance Certificate
- Property tax receipts (for resale transactions)
The all-in cost reminder: stamp duty and registration are charged on top of the base price at the state’s notified rates, GST applies on under-construction units at the notified rate, and then come the sinking fund, advance maintenance, parking and clubhouse membership. Together they are the difference between the price you were quoted and the money that leaves your account — work them out on your own purchase value before you commit.
Step 8: Post-Purchase — Rental Setup, Tax Filing, Repatriation
Once the property is registered, the post-purchase framework determines whether it functions as a genuinely passive asset or a management burden.
Rental setup:
- Appoint a professional property management agency for tenant screening, rent collection, and maintenance. The fee is charged as a share of the monthly rent and varies by agency and by what the mandate covers — get it in writing before you sign
- Execute a registered lease agreement; unregistered leases above 11 months are not legally enforceable in Karnataka
- Rental income flows into your NRO account; repatriation is permitted after applicable taxes, within the annual NRO limit the RBI sets under FEMA
Tax filing in India:
- File Indian income tax returns annually if rental income exceeds the basic exemption threshold
- TDS deducted by tenants (31.2% on NRI landlord rental income) is creditable against your Indian tax liability
- Apply for Form 13 (Lower TDS Certificate) before selling to ensure TDS is calculated on actual capital gains, not gross sale value
Cross-border reporting for US/Canada:
- Rental income declared on Schedule E of IRS Form 1040 (US) or equivalent CRA filing (Canada)
- Indian taxes paid, including tenant-deducted TDS, claimed as Foreign Tax Credits on Form 1116, directly offsetting US tax liability
- DTAA provisions between India and the US/Canada prevent effective double taxation on the same income. Make sure to verify the applicable DTAA provisions for your country of residence
The process flow summary:
| Step | Action | Key Document | Timeline |
|---|---|---|---|
| 1 | Confirm eligibility | Passport, OCI/PIO card | Before shortlisting |
| 2 | Open NRE/NRO account | Bank KYC documents | 1–2 weeks |
| 3 | Shortlist property | RERA certificate | Ongoing |
| 4 | Engage a lawyer and POA | Consulate-attested POA | 2–4 weeks |
| 5 | Complete due diligence | EC, title search, RERA | 2–3 weeks |
| 6 | Arrange financing | Loan sanction or NRE transfer | 2–6 weeks |
| 7 | Register property | Sale deed, stamp duty | 1–2 days |
| 8 | Set up rental and tax filing | Lease agreement, ITR | Post-possession |
Talk to Suyug’s NRI investment team: we handle the entire process so you don’t have to be in India. From RERA verification and POA setup to banking compliance and post-purchase management, every step is managed remotely.
One Thing Worth Sitting With
The step-by-step framework on how to invest in real estate in India, detailed above, is well-established and entirely workable from the US or Canada. What makes the difference between a smooth transaction and a complicated one isn’t the complexity of the process, but whether due diligence at Step 5 is done properly and whether the POA at Step 4 is transaction-specific rather than general. Those two decisions protect everything that follows.
Frequently asked questions
Yes, via a transaction-specific POA attested at your nearest Indian consulate or high commission and adjudicated at the Sub-Registrar’s office in India. The POA holder executes registration on your behalf. Many Tier-1 developers now offer virtual site tours and digital documentation that make the full process remote.
NRE accounts hold remitted foreign earnings and are fully repatriable, making them the cleanest source of funds for property purchase. NRO accounts hold Indian income (rent, dividends) and are repatriable post-tax, within the annual limit the RBI sets under FEMA. For purchase payments, NRE is preferred; for collecting rental income post-possession, NRO is the standard route.
Visit rera.karnataka.gov.in, search by project name or registration number, and confirm that your specific tower has its own registration, and not just a project-level approval. Check the registered completion date, confirm it has not lapsed, and review the buyer complaints section. This takes under an hour and eliminates much delivery risk for remote buyers.
Both are set by notification and revised without notice, so the only reliable figure is the one in force on the day you register. the Karnataka Department of Stamps and Registration (kaverionline.karnataka.gov.in) publishes the rates that apply; take them from there, or ask the developer to state them in writing on the cost sheet. They are payable at registration, cannot be deferred, and are charged on the property value — which makes them a material line on a purchase of this size, alongside GST, maintenance advances and parking charges.
Rental income is declared on Schedule E of IRS Form 1040. Indian taxes paid, including TDS deducted by your tenant, can be claimed as Foreign Tax Credits on Form 1116, directly reducing your US tax liability on the same income. The India-US DTAA prevents effective double taxation in many scenarios.
Four layers sit on top of the base price. Stamp duty and the registration fee, at the rates the Karnataka Department of Stamps and Registration (kaverionline.karnataka.gov.in) has in force on your registration date, each charged as a percentage of the property value. GST on under-construction units at the notified rate. The developer’s own lines — sinking fund, advance maintenance, parking and clubhouse membership — which vary by project and unit and which we do not publish a band for. And the cost of your own lawyer and, if you borrow, the lender’s processing charge. Ask for all of them on a single sheet, in rupees, against your specific unit before booking. The statutory layer is a large one and the one often left out of a buyer’s budget.
Was this useful?
Comments
Was this useful?
Schedule a site visit
Leave your details and the team will call back to fix a convenient date.